
Photo Embroidery | 45–60 Minutes
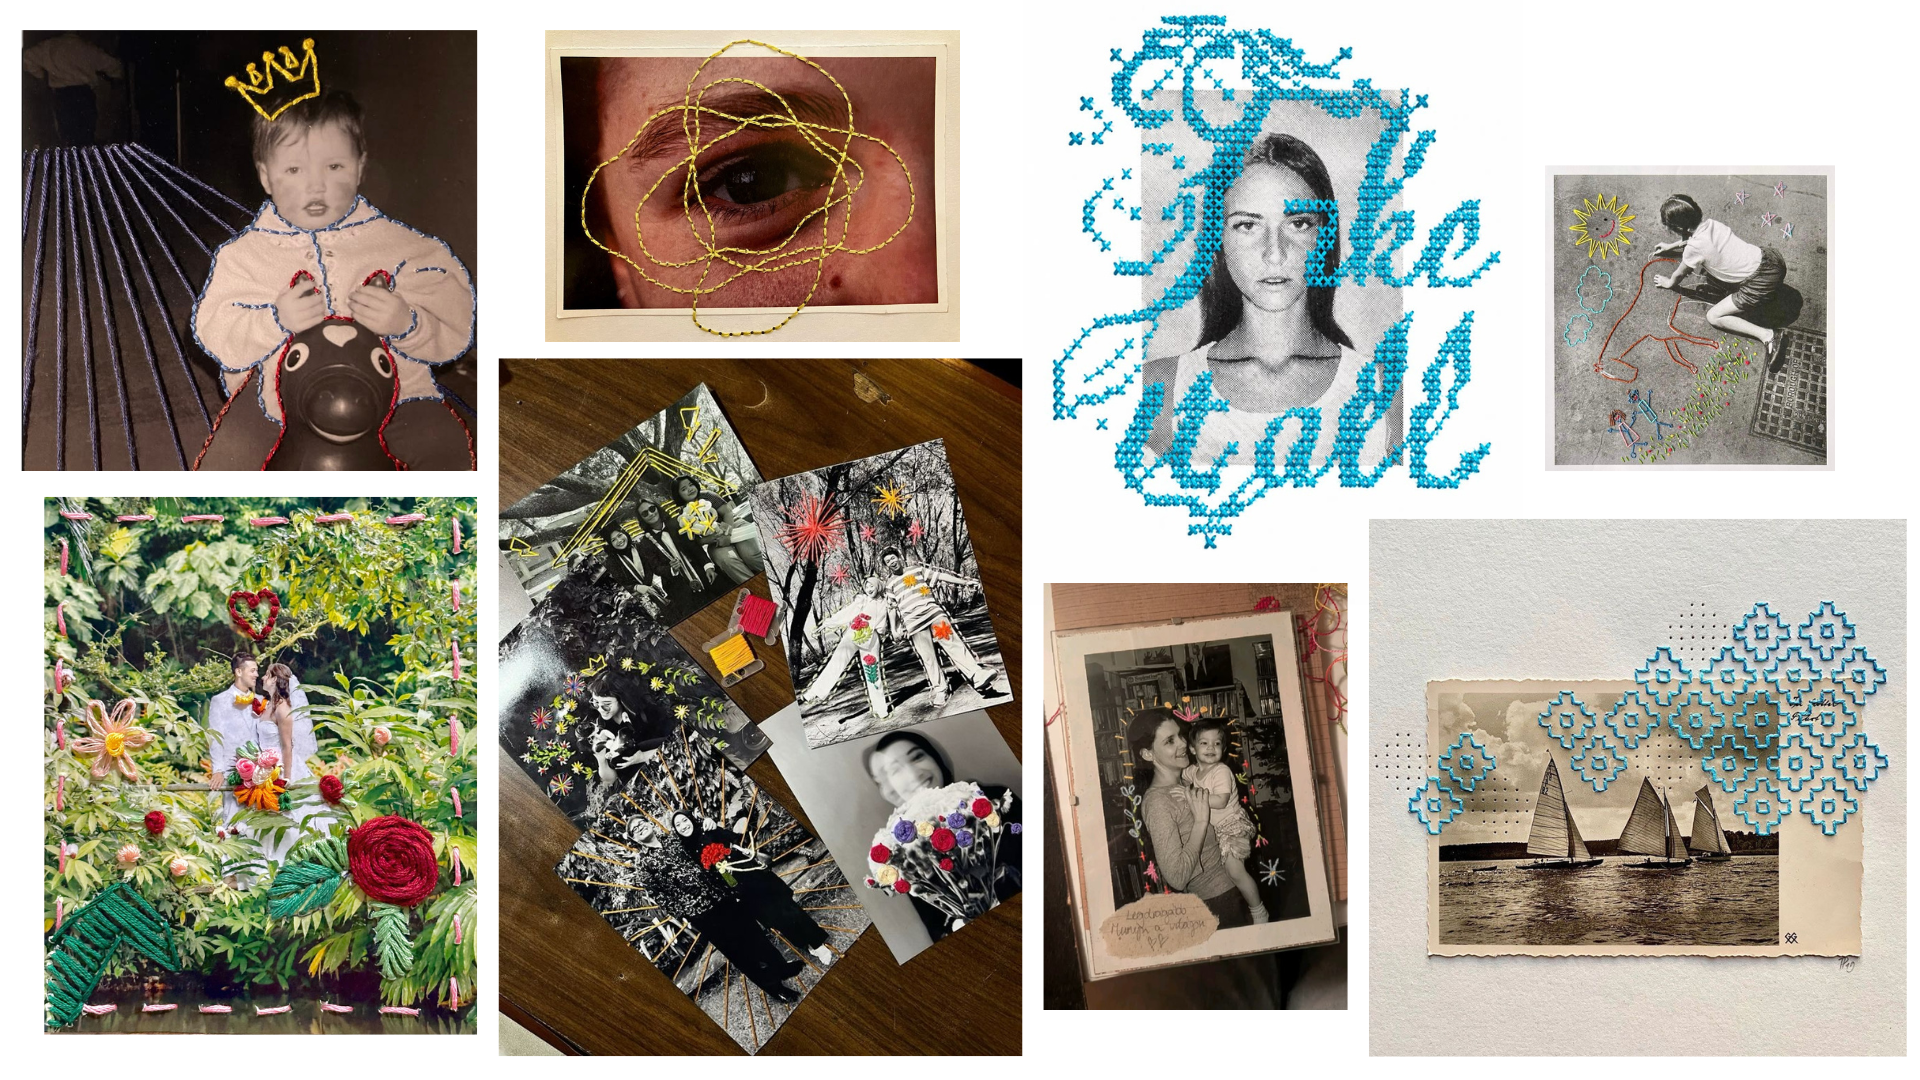
Give your favorite memories a new dimension with embroidery one stitch at a time.
What's on Your Tray
Pencil
Fine-point pen
Embroidery floss
Embroidery needles
Hole-punching tool
Paper display frame
Grid paper
Tracing paper
Foam mat
At the Shared Table
Find these tools in the glass jar.
Scissors
At Reception
Available to share anytime. Just ask our team!
Photo printing service
Japanese writing pens
Colored pencils
Let's Get Stitching
01 — Print Your Memory
Start by choosing a photograph you'd love to work with. Ask one of our team members at reception to help print it for you.
02 — Get to Know Your Stitches
Before you begin, explore two embroidery techniques you can use for this project.
Running Stitch (Beginner-Friendly): A simple series of straight stitches, perfect for outlining shapes, adding details, and creating delicate patterns.
Cross Stitch (A Little More Advanced): Small X-shaped stitches arranged together to create patterns, illustrations, and textured designs.
New to embroidery? We recommend starting with the running stitch!
03 — Sketch Your Design
Your design process will look a little different depending on your chosen stitch.
For Running Stitch:
Draw your design directly onto tracing paper. Mark small dots along your lines, spacing them approximately 2–3 mm apart. These dots will guide where you punch your holes.
For Cross Stitch:
Start with the grid paper provided to plan your design.
Each grid square measures approximately ¼ inch representing one X-shaped stitch. Each X uses the four corners of its square as punching points, making it easy to plan your stitches and keep your design evenly spaced.
Sketch your pattern on the grid paper first, treating each square as one X. Once you're happy with your design, transfer the four corner points of each stitch onto tracing paper.
04 — Prepare Your Photograph
Place your photograph on top of the foam mat, then carefully position your tracing paper over the image.
Using the hole-punching tool, gently pierce through the tracing paper and photograph at each marked point.
Once you've finished, remove the tracing paper. Your photograph is now ready for stitching.
05 — A Little Thread Knowledge
Take a closer look at your embroidery floss. Each piece is made up of six individual strands, which you can separate to achieve different thicknesses.
Through a little trial and error, our team has found the following combinations work beautifully for photo embroidery:
For a standard stitch: Separate 2 strands, thread them through your needle, and fold them in half to create a total of 4 strands. This gives your stitches a lovely, noticeable thickness.
For finer details: Use just 1 strand and fold it in half to create 2 strands. Perfect for delicate lines and subtle details.
Feel free to experiment with different thicknesses to see what works best for your design.
06 — Thread Your Needle
Cut your desired length of floss, separate the strands, and thread them through the needle. Fold the strands in half as described above and tie a small knot at the end to secure them.
07 — Let the Stitching Begin
Starting from the back of your photograph, bring your needle through the first hole and follow your design, moving between the pre-punched holes.
Take your time, keep your thread tension gentle, and watch your photograph slowly come to life!
08 — Secure your stitches
Once you're happy with your embroidery, secure the loose thread on the back of your photograph. You can either tie a small knot or use a piece of tape to hold the thread in place. Carefully trim any excess thread.
09 — Frame Your Memory
Place your finished photograph into the paper display frame provided. The paper display frame can either stand on a flat surface or be hung on a wall whichever you prefer.
And just like that, a favorite memory becomes a one-of-a-kind piece of art, made by you.
A Few Things to Keep in Mind
Always pre-punch your holes before stitching to avoid tearing the photograph.
Avoid placing holes too close together, as this can weaken the paper.
For cross stitch, each ¼-inch grid square represents one X, with four corner holes. Adjacent stitches can share corner holes.
Keep your stitches comfortably loose. Pulling too tightly may cause wrinkles or tears.
Start with a simple design and build on it as you get more comfortable.
Experiment with thread colors and thicknesses to create different textures and effects.
A Little Extra Help
Need a visual guide or some inspiration? Try searching these on YouTube, Pinterest, or TikTok:
Learn the Basics
How to do a running stitch for beginners
Cross stitch tutorial for beginners
How to separate embroidery floss strands
How to thread an embroidery needle
How to start and finish embroidery stitches
Find Your Inspiration
Photo embroidery ideas
Embroidery on printed photographs
Mixed media photo embroidery
Cross stitch pixel art patterns
Creative embroidery on paper
Made something you love? Tag @arttastingroom so we can see your creation!